Electric underfloor heating is becoming one of the most popular ways for homeowners to heat their property. Each year, more and more people are swapping out traditional radiators for underfloor heating, mainly due to a wide range of benefits, from energy efficiency to more warmth across a larger space.
However, you must install the system first to enjoy the warmth and comfort of this underfloor heating. Below is the ultimate guide to installing electric underfloor heating, from preparation to starting up your system for the first time.
How does electric underfloor heating work?
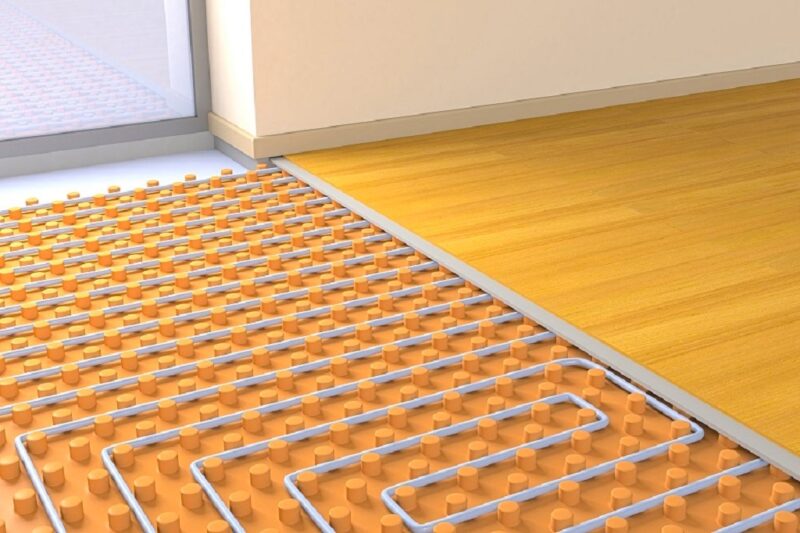
Electric underfloor heating pretty much gives itself away in the name. It’s a source of warmth that comes from below the surface. It involves a series of cables or heating mats connected together under the floor, and when it’s turned on, an electric current will flow through them, generating heat that moves upwards. It’s a system best used for individual rooms and can cover a whole area rather than just a small space like a radiator.
Planning for installation
Before you even consider installing an electric underfloor heating system, you need to do some planning and preparation first. Below are the steps you need to go through to ensure your property is adequately set up for installation:
- Assess your property’s floor and ensure they can have electric underfloor heating installed below it.
- Determine how much heat output the room you’re installing the system needs. This will be based on the size of the room and its insulation.
- By yourself or with a designer, put together a detailed plan of where you’ll place each cable or mat. You’ll also want to decide where the room’s thermostat and other controls will go.
- Ensure you have the right permits to complete an electric underfloor heating system installation in your home.
- Gather the right tools and materials needed for installation. We will provide you with a detailed list below.
- Prepare your floors by cleaning them and removing any debris. This will guarantee the installation goes smoothly.
- If you can’t do the installation yourself, you should speak to a professional and find the right expert to do all the heavy lifting for you.
Tools and materials needed
For a successful electric underfloor heating installation, you must have the right tools and materials before starting. Here is a detailed list of what you’ll need:
Tools checklist
- A cutter that is strong enough to cut through electric cables or heating mats.
- A cutter that is strong enough to cut through insulation boards effectively.
- A spreader that can smooth out the adhesive when applying each element.
- A multimeter that will accurately test each of the electrical connections.
- A tape measure that will help you measure out each of the materials when installing.
- A pair of insulated gloves to protect your hands during the process.
- A pair of safety goggles to protect your eyes during the process.
- A pair of knee pads to protect your knees during the process.
Materials checklist
- The heating elements of your underfloor heating system, such as cables or mats.
- Enough insulation boards to cover the surface area of the system.
- A form of adhesive or tape that will be able to secure each of the heating elements in place.
- A thermostat that can control the system’s temperature when you desire it.
How to install electric underfloor heating
Once you have all your tools and materials together, you can start the installation process. All you need to do is carefully follow the steps outlined below:
1. Get your space ready
Before you do any of the heavy lifting, you need to ensure you have gone through the planning process we outlined earlier in this guide. This includes getting the space ready by cleaning it to perfection (removing any debris, dust, or other flooring materials).
2. Plan the electrical layout
You need to know where you will place each element of the electric underfloor heating system before you install it. Consider various factors such as the room’s dimensions, where you’ll be placing furniture after installation, and if there are any pre-installed fixtures you need to avoid.
3. Place the insulation
While this is an optional step, we highly recommend placing insulation down for your underfloor heating system. This is because it comes with a wide range of benefits, such as minimising heat loss and increasing the energy efficiency of the entire system.
4. Install the heating elements
It’s now time to do the hard work. This includes laying the cables and heating mats on the floor. Follow the plan you’ve already put together and ensure none of the elements overlap. Once they are in place, it’s time to connect all heating elements. Ensure you are careful during this step and follow the manufacturer’s guide.
5. Try out the system
Before you do anything else, you want to ensure that the system actually works, so try it out and see if the cables/mats start to heat up. If the system is working to the right capacity, you can then cover the heating elements. Cover them with the floor finish of your choice.
6. Connect the thermostat
You need a way to control the temperature of your underfloor heating system, so it’s time to connect the thermostat. Choose an area in your room where you want to place it and connect it to the system, following the manufacturer’s guide again. Calibrate the thermostat before you use it for the first time.
7. Final checks
Your electric underfloor heating system is now all setup. All that’s left to do is conduct any final checks, such as turning on the system and seeing whether the thermostat works to change the temperature.
Final thoughts
Installing an electric underfloor heating system isn’t easy, so you need to ensure you have the right know-how and expertise before doing so. If you need a helping hand, you can always consult with a professional who will be more than happy to provide assistance and advice when doing the job.