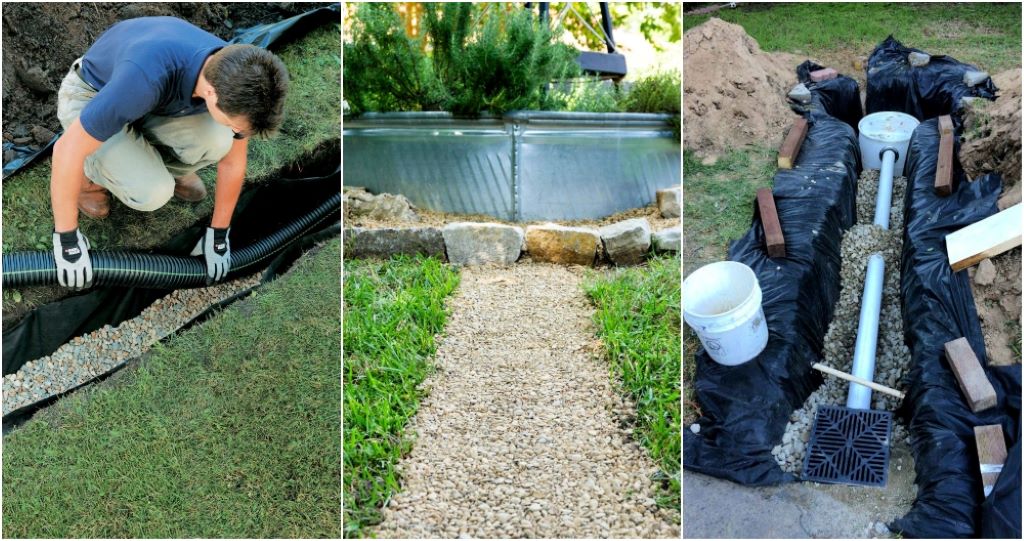
A French drain is a simple solution to deal with standing water or excess moisture in your yard. It’s made up of a trench lined with gravel and piping, allowing excess groundwater to filter into the gravel and move away from your yard. You can install it yourself with the right tools and materials in less than a day. Let me walk you through how to install a French drain. I’ll share tips and tricks I’ve picked up along the way so you can avoid beginner mistakes. Ready to finally tackle that soggy spot? Grab your shovel and let’s get draining!
Gather Tools and Materials
Before doing any kind of project, it’s key to make sure you have all the equipment and materials on hand so you’re not caught halfway through installation scrambling to run to the hardware store. Nothing derails momentum like having an avoidable delay or interruption.
For a French drain project, you’ll need:
Digging tools
- Round point shovel – Easier to dig a trench with than a square shovel
- Garden rake – Smooths trench walls and floor
- Bow rake – Evens out the gravel layer
- Mattock – Breaks up compacted soil if needed
Measuring tools
- Tape measure
- Line level – Ensures pipe slopes properly
Safety gear
- Work gloves
- Safety glasses
- Dust mask – Avoid inhaling loose soil and gravel dust
Gravel and drainage materials
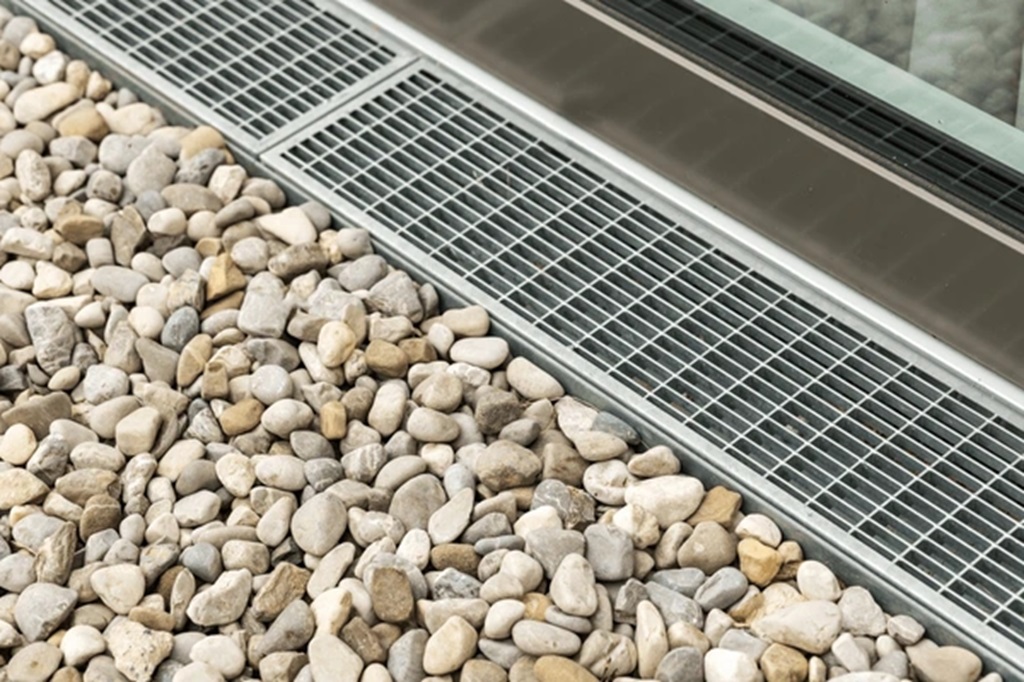
- Washed gravel – Usually 3⁄4-inch or 1⁄2-inch
- Landscape fabric – Prevents soil from filtering into the gravel trench
- Perforated plastic pipe – Allows water flow into the trench
- End cap – Caps off end of the pipe
Miscellaneous
- String
- Wooden stakes
- Shovel
- Wheelbarrow
Now that you’ve assembled your supplies, it’s time to start prepping the project area.
Prep Your Drainage Area
Installing a French drain is very much like building a house—the preparation work makes all the difference. Any shortcuts you take early on or foundation issues that aren’t addressed can cause major problems down the road.
Start by walking through the problem area and trying to visualize your drainage route. Figure out where the wettest area is, where you want the water to ultimately flow to, and the most direct path to get it there. Make sure to consider these key factors:
- Slope – For proper drainage, your pipe needs a consistent downward slope of at least 1%. Use a line level to ensure the slope or grade doesn’t flatten out along any point of the route.
- Discharge point – This is where water will exit the perforated pipe once it’s in the gravel trench. The discharge area needs to be lower than the drain location so that gravity can do its job. Make sure that the discharge point is at least 10 feet away from your home’s foundation and that it slopes away from any structures.
- Digging obstacles – Check whether there are any large tree roots or buried utilities like electrical lines along your planned trench path. You might need to adjust the route avoid them.
- Trench depth – For most DIY drains, your trench should be about 18-24 inches deep to provide sufficient drainage and prevent freezing. Local building codes may dictate a specific depth requirement as well, so check if needed.
Once you’ve mapped out the path, mark it by running a string line between the start and end points. Use wooden stakes pounded into the ground along the string to keep it taut and straightened.
Now comes the real muscle work—grab a shovel and start digging!
Dig the Trench
Digging the trench along your marked line is definitely the most labor-intensive part of the French drain installation process. Just pace yourself, take occasional water breaks, and make sure to stop and stretch if you start feeling any muscle soreness. Having a friend tag team with you can help with efficiency and morale too!
As far as technique, focus first on opening and defining the overall trench space with vertical walls. Then periodically smooth and shape the floor so it stays consistent with the 1% minimum slope requirement you established earlier with the line level. Use the garden rake and mattock often to maintain the trench shape and slope integrity—don’t just focus on digging deeper.
Make sure the finished trench is a consistent depth and width the entire run. Cave-ins or width narrowing can restrict water flow. A good rule of thumb is to size your trench width so there’s at least 2 inches of gravel on all sides of the perforated pipe you’ll be installing later.
Looking good? Great! You’ve done the heavy lifting—now it’s time to add the drainage system components.
Install Gravel and Landscape Fabric
Gravel is arguably the most important functional piece of a French drain. By filling in the open trench space, it creates a reservoir for moisture to collect while also allowing lateral water flow. But before adding any gravel, it’s smart to first line your newly dug trench with landscape fabric.
Think of landscape fabric as a filter between the gravel layer and the surrounding soil. Fold it out along the length of the trench, cut to fit the dimensions, and use garden staples to secure. This prevents soil particles from eventually mixing into the gravel, causing silt build-up which can impede drainage over time.
Now comes the gravel! Slowly fill about 2⁄3 of the trench depth while using your bow rake to evenly distribute. Avoid dumping piles in one spot, as you want uniform thickness. Use the corner of your rake to “slice” the gravel smooth and flatten once it meets the desired height.
The last step before adding piping is a critical one—tamp down and compact the gravel. Why? Doing so eliminates air pockets and creates solid contact between gravel pieces. Poor gravel compaction is a common rookie French drain mistake that severely impacts drainage performance.
Use a hand tamper, push broom handle, or piece of rebar to thoroughly tamp down and compact the entire gravel layer in 6-12 inch sections. Recheck your slope/grade with the line level as you move down the trench. Looking dense, solid, and sloped? Nicely done! Let’s connect the pipe.
Install Perforated Piping
The perforated plastic piping you chose earlier serves as the “evacuation vessel” for collected trench water. So it needs to run the entire trench length with a consistent downward slope.
Start by placing your piping at the discharge point—the trench location closest to where groundwater exits. Ensure the perforated side faces down in full contact with the tamped gravel layer beneath. This allows moisture to seep through the perforations and into the reservoir gravel.
Slowly unroll the piping back towards the start of the trench, securing any couplings or connections tightly. Use a point shovel to embed the piping about an inch down into the gravel, taking care not to damage or “kink” it. Maintaining proper slope is critical for achieving proper drainage.
Once fully unrolled and secured in place along the entire trench run, it’s time to backfill with more gravel.
Backfill and Compact Gravel
Your almost finished! Just needs a bit more gravel and compaction work.
Start by filling the trench back up with gravel until you almost reach ground level. Pour slowly and use your bow rake often to distribute the gravel evenly around the embedded piping.
Just like before, carefully compact the final gravel layer in sections. This further stabilizes everything and removes tiny air gaps that could impact water flow. Use your tamping tool of choice and boot power if needed!
Smooth and slope the final gravel surface using your rake so it has a subtle downward run matching the buried perforated pipe below. Try dropping a few cups of water at the start point and you should see it funnel nicely through the gravel and exit the discharge point.
Last step—cap it off!
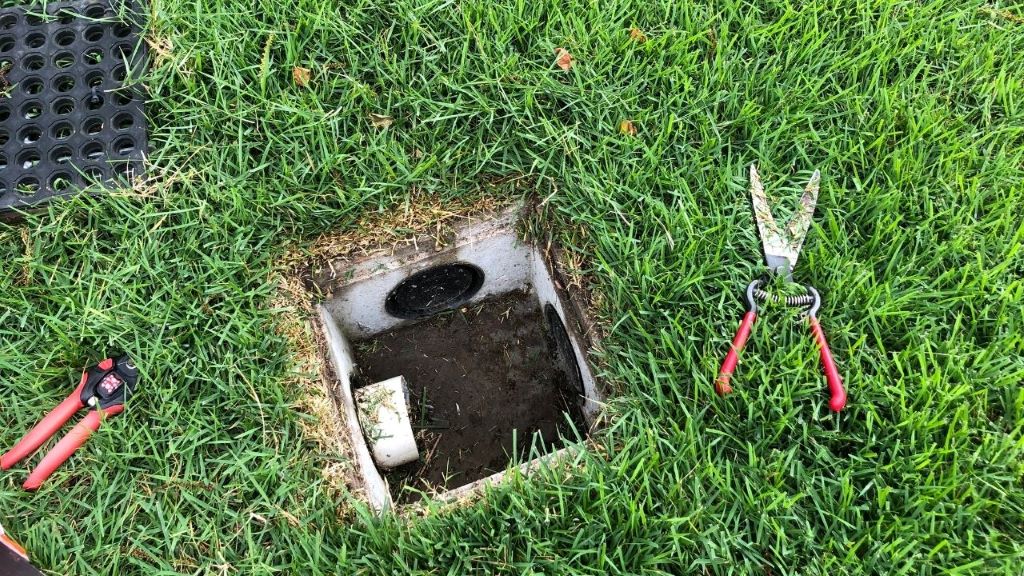
Install End Cap
Before backfilling that last bit of trench with surrounding soil, it’s important to correctly cap off the end of your perforated drainage pipe. This prevents soil or debris buildup which could block water flow.
Dig a small hole at the starting end of the trench where the pipe begins. Slide on your end cap tightly and use a bit of excess gravel to further secure it in place.
Now you can go ahead and backfill the last few inches of trench with leftover soil and compact it lightly with a tamper. Sprinkle on some grass seed to complete your expertly installed French drain!
Sit back with a nice cold drink and admire your handiwork. And remember—patience is key for new seedlings and French drains alike. Make sure to wait out a few heavy rains before evaluating whether runoff has improved in your problem areas.
Let dryness prevail!
FAQs
How long does a French drain last?
With proper installation and maintenance, a French drain can last for several decades or more. Make sure to use the right gravel/landscape fabric and keep surface areas free of debris.
Can I install a French drain in winter?
It’s best to wait until spring or summer when the ground has thawed. Trying to dig through frozen soil can be extremely difficult.
What size gravel is best?
Usually 3⁄4 inch or 1⁄2 inch washed drainage gravel works well to allow water flow while preventing soil intrusion. Pea gravel is too small and can clog.
Can I use plastic sheeting instead of landscape fabric?
Plastic is not recommended as it can tear over time. High quality landscape fabric specifically made for drainage projects is reusable and helps filters soil long-term.
How often should my French drain be cleaned?
In most cases, a properly working French drain won’t need cleaning for 3-5 years. Monitor functionality when heavy rains occur. If puddling returns, use a drain snake to clean out sediment buildup.
Last Words
French drains are a simple yet effective solution for dealing with pesky wet spots and moisture around your property. Yes, installation involves considerable digging and it’s important to do careful planning beforehand. But the significant benefits you’ll gain from years of improved drainage and drier landscaping makes tackling the project well worth the effort. Just follow the key steps outlined here for constructing your trench, integrating gravel and piping, and properly diverting troublesome water away from soggy areas. When it comes to maintaining your French drainage system, knowing how to snake a drain is an essential skill. Couple that with routine maintenance, and your system should operate smoothly for decades before needing attention. So grab a shovel, pick your path, and start digging your way towards a drier yard, ensuring a hassle-free drainage experience.